1 Tool-Bar Overview
Below is a listing of all the different tool bars contained in the EOS V3 program and a brief description of the toolbars functionality .
The default of the program is set to show all of the below toolbars, you can choose to show or hide selective tool-bars under the Help Menu>>Show/Hide Toolbars
Additionally, the Object list can be hidden or displayed by selecting the Tools Menu>>Show/Hide Object List, or selecting the appropriate icon in the Users Toolbox outlines below
Menu Bar

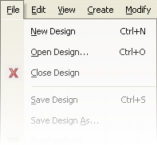 The Drop down menus are arranged across the top of the screen, Each menu has several options available once clicked.
Explore all of the Drop down menu items by clicking the menu items.
Note that some items have a letter or combinations (Ctrl+N) These are the keyboard hotkeys that you can use to access that function in the program.
A complete listing of all Hot-Keys is available in the Help Menu >> Keyboard Map
Standard Toolbar

The Standard tool bar is mainly used for basic input and output functions, it contains the following icons.
 New Design (Start a new Blank Canvas)
 Open Design (Open an already digitized design )
 Save Design (Save the design that is currently on the canvas)
 Print Design (Product a printed version of the design)
 Copy Selection (Copy’s the selected item or items to the clipboard, this will be discussed later in the Select section)
 Paste (Paste’s the selected item or items from the clipboard, into the current canvas this will be discussed later in the Select section)
 Undo (reverses the last operation)
 Redo (Reverses the last undo)
 Stitch Count of current canvas
Zoom ToolBar
The Zoom Toolbar controls the magnificatin factor of the design on the screen.

 Magnify the selected area (Zoom In)
- Select the Zoom In icon

- Position the mouse cursor on the canvas near the area you want to magnify
- Click and hold down the left mouse button dragging a box around the desired area
- Release the left mouse button
Alternatively, you can select a desired magnification factor from the drop down list.
 Decrease the Selected Area (Zoom Out)
 Center the design, Keep current Magnification factor
 Fit design to Screen
 Display design at actual size
 Current Magnification Factor
 Undo last zoom
 Redo last zoom
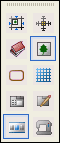
User Toolbox
The User toolbox contains quick access to common functions, You can add to this box or create a new toolbox if you prefer.
 |
Change Size |  |
Center Design |
 |
Library |  |
Show/Hide background Image |
 |
Show/Hide Hoop |  |
Show/Hide Grid |
 |
Info Card |  |
Embroidery Settings |
 |
Show /Hide Object List |  |
Send to Machine |
Object List
The Object list is positioned at the bottom of the screen. This list displays all of the different objects (layers) in the design as well as the connections between these objects. Each icon in the object list represents one block or function. Items in the object list can be selected by clicking on them with the left mouse button.
The Object list is integral to the editing process of the designs.

The object list s covered in more detail i the next lesson
Needles Bar
The Needles bar is arranged at the bottom of the screen and allows you to assign needle changes, stops or thread trims as well as alter the screen colors.